What Do Hunters Need the Most? A Hunter’s List

What Do Hunters Need the Most? A Hunter’s List

What Do Hunters Need the Most? A Hunter’s List

Introduction

As the leaves turn, the air grows crisp, and the forest floor crunches underfoot, deer hunters eagerly prepare for their favorite time of year. For these dedicated outdoorsmen and women, the thrill of the hunt isn’t just about bagging the big buck; it’s about embracing the challenges of nature, the camaraderie of the hunt, and the connection to the wilderness.

Yet, the deer season isn’t all picturesque scenes and unforgettable moments. It’s often a battle against the elements, with hunters facing chilly temperatures and unpredictable weather as they perch in tree stands or stalk through the woods.

Staying warm and comfortable during these colder months is essential, making thoughtful gifts a boon for any deer hunter.

Safety, too, is a paramount concern. Deer hunting can be an exhilarating yet risky pursuit, and hunters must take precautions to ensure they return home safely from the woods. From harnesses that secure them in lofty tree stands to adequate hunting boots that help them navigate challenging terrain, the safety of deer hunters is a priority.

In this guide, we’ll explore a variety of gifts perfect for deer hunters. From the best gear to keep them warm and comfortable to safety equipment and thoughtful, affordable options, this article is your ultimate resource for finding the perfect gift for the deer hunter in your life. 

Whether they’re a seasoned pro or just starting their journey, these gifts are sure to enhance their hunting experience and keep them safe as they pursue the elusive deer. So, let’s dive into the best gifts for deer hunters, tailored to their unique needs and challenges.

Disclosure: this article contains Amazon Affiliate links. As an Amazon Associate, I earn from qualifying purchases at no extra cost to you.

The Best Overall Gifts for Deer Hunters

When it comes to choosing the best overall gifts for deer hunters, you’ll want to consider items that enhance their comfort and performance during long hours in the field.

Deer hunting often involves enduring the elements, including cold weather, so providing gear that keeps them warm and cozy is a thoughtful gesture.

Here are some top picks for gifts that any deer hunter will appreciate: 


Heated Insoles

Bitterly cold feet can quickly dampen a hunter’s spirits, making heated insoles a game-changer. These battery-operated wonders can keep feet warm and toasty, ensuring that hunters can stay in their stands longer, increasing their chances of a successful hunt.

Heated Vest

A heated vest provides core warmth, which is crucial in cold conditions. These vests are lightweight, easy to wear under hunting gear, and can be adjusted to the desired temperature, making them a versatile addition to any hunter’s wardrobe.

Cleaning Knife

A high-quality knife is a timeless and practical gift for a deer hunter. From field dressing to other essential tasks, a sharp, durable knife is an indispensable tool.

Rechargeable Hand Warmer

Keeping hands warm is essential during cold hunts, and rechargeable hand warmers offer a convenient solution. They can be slipped into pockets to provide much-needed heat when it matters most. 

These devices can be used multiple times, making them eco-friendly and cost-effective in the long run.

Don’t let cold hands keep you from missing your target this winter!

Rechargeable Hunting Socks

Cold feet can be a real hindrance to deer hunting, and heated socks are a fantastic solution. These rechargeable socks are designed to keep feet comfortably warm, ensuring a hunter’s focus stays on the hunt, not the chill in the air.

Neck Gaiter

A versatile piece of clothing, a neck gaiter can keep hunters warm while also serving as a face mask or head covering, depending on the situation.

A neck gaiter is one of the most underrated pieces of clothing for those cold days in the tree stand.

These gifts cover a range of needs, from staying warm to having essential tools at hand, making them excellent choices for deer hunters who appreciate both comfort and practicality.

Best Safety Gifts for Deer Hunters

Safety is a top priority for any deer hunter. Whether they’re perched high in a tree stand or navigating challenging terrain, having the right safety gear is essential.

Here are some of the best safety gifts for deer hunters:

Safety Harness

A safety harness is a must-have for any hunter using a tree stand. It provides security and peace of mind, reducing the risk of falls and injuries from 12 feet or higher off of the ground!

This is the exact same safety harness that I use.

Linemen Rope

A linemen rope is a valuable accessory that allows hunters to easily ascend and descend from their tree stand while staying securely connected to a safety harness.

These are invaluable when a hunter is hanging tree stands or trimming trees to create shooting lanes. 

Safety Line

A safety rope serves as a lifeline, allowing hunters to stay connected to the tree at all times. It’s an additional layer of protection that no tree stand user should be without.

This 30 foot safety line is a must for anyone hunting out of a tree stand. 

These safety gifts are vital for ensuring that deer hunters can focus on their pursuit without compromising their well-being. Don’t ever skimp out on safety gear. 

Best Gifts Under $50 for Deer Hunters

Not all great gifts for deer hunters need to break the bank.

If you’re shopping on a budget, consider these thoughtful and affordable options:

Batteries

Deer hunters rely on headlamps and game cameras to monitor their hunting grounds. Providing a supply of spare batteries ensures they won’t be left in the dark when they need it most. 

Check with your hunter as to which batteries they use the most for their hunting accessories. Simple, but these make a great gift!

AA batteries are used for game cameras and can run out of juice quickly in cold temperatures. Make sure your hunter is stocked up so their game cameras aren’t dead in the peak of the hunt!

AAA batteries are used for head lamps which allow the hunter to walk in and out of the field hands-free of a flashlight.

Having too many batteries isn’t possible when you’re a deer hunter!

Thermos

A warm beverage can make a world of difference during a chilly hunt. A high-quality thermos keeps coffee or hot chocolate hot throughout the day.

Keep coffee warm on those cold, late season hunts!

Archery Practice Target

An archery target is a budget-friendly gift that helps hunters hone their accuracy and maintain their skills. It’s an excellent addition to any practice routine. 

These gifts under $50 show that you can find practical and thoughtful presents for deer hunters without straining your wallet.

Best Hunting Clothes to Gift a Deer Hunter

Comfort and warmth are paramount for deer hunters spending extended periods in the woods. The right clothing can make all the difference.

Here are some of the best hunting clothes to gift a deer hunter:

Cold Weather Socks

High-quality hunting socks, like those from Darn Tough, are designed for warmth and durability. They keep feet comfortable and dry during long, cold hunts.

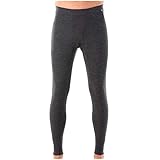
Merino Wool Base Layer

A merino wool base layer provides essential insulation and moisture-wicking properties, making it ideal for staying warm and comfortable during a hunt.
Warm Gloves

Cold hands can be a hindrance while deer hunting. Choose warm gloves designed for hunting, featuring insulation and dexterity for handling gear and firearms.

These clothing gifts ensure that deer hunters can stay comfortable, focused, and ready for action in any weather conditions.

Summary: Find The Perfect Gift for Your Deer Hunter

Deer hunting is not just a sport; it’s a passion, a connection to nature, and a tradition that spans generations. To show your appreciation for the deer hunter in your life, we’ve compiled a comprehensive guide to the best gifts that cater to their unique needs and challenges.

For the best overall gifts, we’ve selected a range of items designed to enhance comfort, convenience, and performance during those long hours in the field. Heated insoles, vests, and rechargeable hand warmers will keep the chill at bay, while quality knives and versatile gear like neck gaiters are invaluable additions to any hunter’s arsenal.

Safety is paramount for deer hunters, and our selection of safety gifts includes harnesses, linemen ropes, and safety ropes to ensure they stay secure while pursuing their prey.

If you’re shopping on a budget, our collection of gifts under $50 won’t disappoint. From batteries for headlamps to a trusty thermos for hot beverages and archery targets for honing their skills, these affordable options deliver big on value.

Lastly, we’ve not forgotten the importance of comfortable and warm clothing for deer hunters. Darn Tough hunting socks, merino wool base layers, and warm gloves are all essential for braving the cold and staying focused on the hunt.

The best part? You can easily explore and purchase these items through the affiliate links provided in this article. By doing so, you not only find the perfect gift for your deer hunter but also support our website and the valuable content we bring to outdoor enthusiasts like you.

So, as you embark on your journey to select the ideal gift for the deer hunter in your life, consider exploring the affiliate links in this article. You’ll be giving the gift of comfort, safety, and success in the field while helping us continue to provide you with valuable information for outdoor adventures. Happy hunting and happy gift-giving!

Didn’t find what you were looking for? Check out this article for my top recommended hunting boots!

About the Author

About the Author

Taylor Kuhlmann, PT, DPT, CSCS

Taylor Kuhlmann is a licensed physical therapist in Kansas, a certified strength and conditioning specialist accredited by the National Strength and Conditioning Association, and the founder of High Caliber Health.

With a passion for guiding hunters and outdoor enthusiasts, Taylor focuses on enhancing their overall health and wellness, enabling them to experience the outdoors with reduced pain and enhanced performance.

EMOM Workout for Bulging Disc: STOP Back and Leg Pain with this EASY (20 minute) EMOM Workout!

EMOM Workout for Bulging Disc: STOP Back and Leg Pain with this EASY (20 minute) EMOM Workout!

EMOM Workout for Bulging Disc: STOP Back and Leg Pain with this EASY (20 minute) EMOM Workout!

Introduction

EMOM exercise routines are intended to help individuals perform exercises in a timely manner.

This EMOM workout for a bulging disc will require JUST 20 minutes of your day to complete. 

I recommend performing each exercise listed below 4 times. 

After you complete the 4th round, it’s a good idea to spend 5 to 10 minutes doing easy stretching or walking routine to help your body calm down.

This makes you feel nice after you’re all done!

Sharp or radiating pain in the legs can be secondary to bulging disc. When this occurs, the bulging disc causes irritation to the lumbar nerve roots that travel down the legs. 

Irritation to a lumbar nerve root can cause pain anywhere in the leg, but is typically experienced along the buttocks, lateral or posterior thigh, or along the calf and lateral ankle. 

When you’re doing these exercises, pay attention to your body.

If the pain goes down your leg and gets worse, it’s best to stop that exercise.

However, if the pain goes up your leg, that’s actually a good thing and can indicate that the pain from a bulging disc or irritated nerve will likely get better soon.

If a bulging disc is present and causes leg pain, these exercises may help reduce the pain, improve mobility, and allow you to continue doing the things you love. 

Below I have created an EMOM exercise routine that can help improve symptoms of a bulging disc.

Ready to get started?

Let’s go!

1. Sciatic Nerve Flossing

Sciatic nerve flossing is a technique used to alleviate sciatic nerve pain and improve nerve mobility.

Start by sitting on a chair or bench with your feet flat on the ground. Straighten one leg and extend it in front of you while keeping your heel on the ground. Point your toes up towards your body, then slowly flex your foot downward as you move your head up and down.

Your head and foot should move in unison. Pull the toes (or foot) up towards you as you look up with your head. Then do the opposite – point the toes down as you look to the floor. 

Repeat this movement for several repetitions while gradually increasing the range of motion.

Sciatic nerve flossing helps mobilize the sciatic nerve and surrounding tissues, reducing pain and promoting better nerve function.

Perform 15 repetitions.

2. Prone on Elbows

Prone on elbows is an exercise that helps strengthen the muscles of the upper back and improve posture.

Begin by lying on your stomach with your elbows positioned directly beneath your shoulders. Lift your upper body off the ground by pushing through your elbows and forearms, keeping your chest up and your shoulder blades squeezed together. Hold this position for a few seconds and then lower back down.

Prone on elbows targets the muscles of the upper back, including the rhomboids, trapezius, and erector spinae, helping to improve upper body strength, posture, and stability.

Perform for the full 60s. 

3. Prone Press-Ups

Prone press ups are an exercise that helps alleviate lower back pain and improve spinal mobility.

Start by lying on your stomach with your hands placed flat on the ground next to your shoulders. Push through your hands, lifting your upper body off the ground while keeping your hips and pelvis on the floor.

Extend your arms as far as comfortable, feeling a stretch in your lower back. Hold this position briefly, then slowly lower your upper body back down.

Prone press ups target the muscles of the lower back, improve spinal extension, and can help relieve compression in the lumbar region.

Perform 15 repetitions.

4. Sidelying Open Book

The side lying open book is a mobility exercise for the thoracic spine (upper back).

Lie on your side with your knees bent and arms extended in front of you. Keeping your lower body stable, rotate your upper body by reaching your top arm and opening it up towards the opposite side, following the movement with your eyes. Allow your upper back to rotate as much as possible while keeping your hips and legs still.

Return to the starting position and repeat on the other side. Sidelying open book improves thoracic spine mobility, helps counteract the effects of sitting and poor posture, and promotes better rotational movement.

Perform 8 repetitions each side.

5. Standing Repetitive Lumbar Extension

Standing repetitive lumbar extension is an exercise that targets the muscles of the lower back and promotes lumbar spine mobility.

Stand with your feet shoulder-width apart and place your hands on your lower back, fingers pointing downward. Slowly lean back, arching your lower back and pushing your hips forward.

Hold the position briefly and then return to an upright stance.

Repeat this movement for several repetitions, focusing on the smooth and controlled motion.

Standing repetitive lumbar extension helps increase flexibility in the lower back, strengthen the supporting muscles, and improve overall lumbar spine mobility.

Perform 20 repetitions. 

Two Additional Things You Cannot Neglect

1) A positive mind set

and

2) Taking frequent walks 

Oftentimes, individuals lose hope and a positive mindset when they experience pain, especially with nagging leg pain from an irritated nerve.

Numerous research articles indicate that bulging discs are very prevalent among individuals over 30 years old and are a part of the natural aging process. 

Maintain a positive mindset, walking, and pain-free exercises are three things that can assist you in conquering back pain and returning to the outdoors.

Conclusion

A bulging disc and associated leg pain can be very frustrating, annoying, and certainly uncomfortable. Typically, lumbar extension exercises are beneficial for individuals experiencing symptoms consistent with a bulging disc.

The sample EMOM workout for bulging discs are just a few movements that can help alleviate back and leg pain from a bulging disc.

It is important to recognize movement patterns or certain activities that change the severity of your symptoms. If sitting for 30 minutes causes pain to worsen, then avoiding a sitting position for 30 minutes is advisable.

On the contrary, if any certain movement or exercise helps improve comofort or alleviate pain, then keep those movements handy and remain active.

Get up and move frequently – a body in motion stays in motion. 

About the Author

About the Author

Taylor Kuhlmann, PT, DPT, CSCS

Taylor Kuhlmann is a licensed physical therapist in Kansas, a certified strength and conditioning specialist accredited by the National Strength and Conditioning Association, and the founder of High Caliber Health. With a passion for guiding hunters and outdoor enthusiasts, Taylor focuses on enhancing their overall health and wellness, enabling them to experience the outdoors with reduced pain and enhanced performance.

How Do I Increase Draw Weight for Archery?

How Do I Increase Draw Weight for Archery?

How Do I Increase Draw Weight for Archery?

Introduction

Increasing draw weight requires a holistic strategy that encompasses strength training, consistent shooting practice, proper nutrition, and flexibility upkeep.

Increasing draw weight offers various benefits, whether you’re gearing up for larger game hunting or aiming to enhance your shot lethality. Rather than abruptly increasing your draw weight by 20-30 pounds, I recommend adopting a systematic plan to attain goals while minimizing injury risks.

Embracing a strategic approach not only aids in achieving bow hunting aspirations but also mitigates the possibility of sidelining injuries due to improper handling.

Avoid the trap of overexerting and injuring yourself while attempting to overpower your bow. Such injuries could hinder your upcoming hunting season.

How Do I Train for Higher Draw Weight?

Training to increase your draw weight requires a well-rounded approach that combines strength training, consistent shooting practice, proper nutrition, and flexibility maintenance.

Let’s dive into each aspect to understand how to effectively train for higher draw weight, all while prioritizing injury prevention and overall health.

Strength Training: 3-4 Times a Week:

A solid strength training routine is the foundation for building the muscles necessary for drawing a higher weight bow. Focus on exercises that target the key muscle groups used in archery, such as the back, shoulders, biceps, and core. Incorporate compound movements like bent over rows, lat pulldowns, and shoulder presses to engage multiple muscle groups simultaneously.

Choose 4-5 of the exercises from this blog post to work into your weekly routine. Mix and match throughout the week to ensure you are targeting all areas of your body.

Dumbbells are the most versatile piece of exercise equipment you can own for your at home workouts. The dumbbells below can certainly assist you in increasing your draw weight!

Shooting Practice: 2-3 Times a Week

The adage “practice makes perfect” resonates profoundly here. Consistent shooting practice is indispensable for perfecting archery skills and gradually increasing draw weight. 

Allocate dedicated time each week to shoot your bow, with the focus on maintaining proper form, technique, and precision.

Start with a manageable draw weight and gradually increase it as your muscles acclimate to heightened tension. Regular practice not only empowers you to handle increased draw weights but also bolsters confidence and shooting accuracy in real hunting scenarios. 

Each practice shot should prepare you for the one shot that matters this fall. 

Optimize Protein Intake:

Protein plays a crucial role in muscle repair and growth, making it a vital component of your nutrition plan when training for higher draw weight. Aim to consume 1 gram of protein per pound of body weight daily from sources like lean meats, poultry, fish, eggs, and dairy.

Consider incorporating protein supplements into your diet if needed, especially after intense workouts, to support muscle recovery and development.

Based on my experience, a significant number of people fail to meet their daily protein intake recommendations. This deficiency can hinder progress and impede improvements in muscle strength, and ultimately, increasing draw weight. 

Maintain Flexibility:

In archery, flexibility is key to achieving optimal shooting form and preventing injuries. Incorporate regular stretching and mobility exercises into your routine to maintain flexibility in the spine, hips, and shoulders. 

Warm up before strength training and shooting practice with dynamic stretches to prepare your muscles for action. After workouts, include static stretches to improve flexibility and reduce muscle tightness.

A supple and flexible body will not only aid in handling higher draw weights but also contribute to better shooting mechanics and overall performance.

By adhering to a holistic training regimen and ensuring adequate protein intake, you’re poised to increase your draw weight and ascend to new pinnacles in your bowhunting adventures.

Keep in mind that patience, consistency, and proper technique are crucial components of a successful journey towards increasing draw weight.

Advantages for Increasing Draw Weight with Archery:

Increasing draw weight holds a range of advantages, particularly for passionate hunters seeking to amplify their performance in the field.

Let’s explore the advantages that come from using a higher draw weight while shooting in the field.

Increased Arrow Speed:

With a higher draw weight, the bow imparts more energy to the arrow, resulting in increased arrow speed. Faster arrows cover the distance to the target more quickly, reducing the time it takes for your shot to reach its mark. This increased arrow speed proves especially valuable when engaging moving targets or those prone to being easily startled.

Improved Penetration:

Higher draw weights generate greater kinetic energy upon release, leading to improved arrow penetration. When hunting larger game or faced with challenging shot angles, this increased penetration can make the difference between a clean, ethical kill and a wounded animal.

Greater Effective Range:

The added power of a higher draw weight extends your effective shooting range. This means you can confidently take shots at longer distances, giving you more opportunities to secure a successful harvest.

Enhanced Accuracy:

When properly trained and conditioned for higher draw weights, you’ll notice improved shooting stability and reduced bow movement. This enhanced control translates into greater shot accuracy, allowing you to place arrows with precision.

Adapting to Hunting Conditions:

Hunting situations can vary, and sometimes you may need to draw your bow under less-than-ideal circumstances, such as when wearing heavy clothing during cold weather. Being accustomed to a higher draw weight prepares you to handle these situations with ease and consistency.

Physical Strength and Endurance:

Drawing a higher weight bow requires greater physical strength. Regularly practicing with higher draw weights can help build and maintain the necessary muscles for archery, contributing to improved overall strength and endurance.

Why You May NOT Want to Increase Draw Weight

While increasing draw weight offers numerous benefits, it’s important to consider potential drawbacks that might lead you to reconsider this endeavor. Let’s examine several reasons why you might hesitate to raise your draw weight:

Muscle Fatigue

Elevating your draw weight can subject your muscles to heightened strain and fatigue, particularly during extended practice sessions. Over time, this could impede your ability to maintain consistent and accurate shots, impacting both your training progress and in-field performance.

Breakdown in Technique

A heavier draw weight can inadvertently lead to a breakdown in your shooting technique. As your muscles contend with increased tension, you might find it challenging to uphold the smooth and precise form essential for accurate shooting. This regression in technique could hinder your progress and undermine your shooting confidence.

Increased Risk of Injury

Training with a higher draw weight without proper preparation or progression can elevate the risk of injuries. Straining muscles or overexerting yourself could result in strains, muscle imbalances, or even more serious injuries, setting back your training schedule and overall archery goals.

Decreased Accuracy

Ramping up draw weight can potentially lead to a temporary decrease in accuracy. As your body adapts to the heightened tension, your shots might become less consistent and less precise. This dip in accuracy can be frustrating and might require extra time to recalibrate your shooting skills.

Requires More Body Movement

Drawing a bow with a higher weight might necessitate additional body movement to compensate for the increased tension. This can affect your shooting stability and introduce variability in your shots, making it harder to maintain the steady aim required for accurate targeting.

Balancing the advantages of higher draw weight with these potential drawbacks is essential for making an informed decision.

Careful consideration of your physical capabilities, training regimen, and long-term archery goals will help you determine whether increasing draw weight is the right step for you.

In Conclusion: Striking the Balance

Embarking on the journey to increase draw weight involves a delicate balance between the undeniable benefits and the potential challenges it presents.

As we’ve explored the advantages of enhancing draw weight, from augmented arrow speed to expanded effective range, it’s evident that this pursuit can elevate your archery skills and bolster your performance in the field.

However, it’s equally crucial to acknowledge the factors that might give you pause when considering this leap. Muscle fatigue, potential breakdowns in technique, an increased risk of injury, temporary accuracy fluctuations, and the demand for heightened body movement all underscore the importance of measured approach.

As you tread this path, keep in mind that patient progression and meticulous attention to technique are paramount. The decision to increase draw weight should be rooted in a deep understanding of your body’s capabilities and your archery aspirations. Diligently nurturing your muscles through strength training, fine-tuning your shooting skills through consistent practice, and supporting your body with proper nutrition and flexibility maintenance will serve as your guiding principles.

In the diverse world of archery, choosing to raise draw weight directly impacts your accuracy, power, and skill. By embracing benefits, recognizing challenges, and navigating with care, you create a balanced blend of expertise and strength. This journey paves the way for progress in archery, leading to personal growth and success.

Disclosure: as an amazon affiliate, I earn commissions from qualifying purchases made through the links provided on this website and blog posts, which help support its maintenance and content creation.

About the Author

About the Author

Taylor Kuhlmann, PT, DPT, CSCS

Taylor Kuhlmann is a licensed physical therapist in Kansas, a certified strength and conditioning specialist accredited by the National Strength and Conditioning Association, and the founder of High Caliber Health. With a passion for guiding hunters and outdoor enthusiasts, Taylor focuses on enhancing their overall health and wellness, enabling them to experience the outdoors with reduced pain and enhanced performance.

25 Exercises to Increase Draw Weight

25 Exercises to Increase Draw Weight

25 Exercises to Increase Draw Weight

Introduction

Achieving a higher draw weight is a goal shared by many passionate archers and bowhunters, driven by various motivations. If you’re looking to enhance your archery experience with smoother draws, precise shots, and reduced fatigue, then you’ve come to the right place.

This blog post is designed to be your ultimate guide, featuring targeted exercises that will effectively increase your draw weight, boost your confidence, and elevate your hunting skills to unparalleled heights.

Whether you’re pursuing whitetail deer or turkey with a #40 draw, or daring to take on more formidable game like elk or moose, which demands at least a #60 draw, it’s crucial to adhere to your state’s regulations regarding minimum draw weight. While it’s essential to shoot within your personal capabilities, I strongly believe in pushing yourself to maximize your draw weight.

Not only does a higher draw weight lead to ethical and lethal shots, but it also enhances your overall hunting prowess.

In this post, we’ll delve into 25 exceptional strengthening exercises specially curated to increase your draw weight and take your hunting abilities to the next level.

As a physical therapist and strength and conditioning specialist, I’ll also provide you with my top 5 recommended exercises to boost your draw weight significantly.

But before we jump into these exercises, let’s gain a deeper understanding of the crucial muscle groups involved in archery and bowhunting, laying the foundation for your journey towards becoming a more skilled and capable archer or bowhunter.

What muscles do you train for archery?


Before we explore the exercises that can help increase draw weight, it is essential to identify and understand the key muscles involved in archery. Excelling in archery and minimizing the risk of injury relies on targeting specific muscle groups.

The following muscle groups play crucial roles in archery performance:

Rotator Cuff

The rotator cuff, consisting of four muscles, stabilizes and rotates the shoulder joint. Neglecting this group is akin to forgetting your release while bow hunting, and it significantly increases the risk of shoulder injuries.

Biceps

Vital for the draw arm, the biceps assist in flexing the elbow and pulling the string. Strengthening the biceps is directly linked to developing a powerful back, which enables you to handle higher draw weights and achieve success in the field.

Rhomboids and Trapezius

These muscles stabilize the shoulder blade, contributing to steady bow drawing and precise aiming. Strengthening these back muscles is crucial for both archers and bowhunters alike.

Latissimus Dorsi and Deltoids

Essential for drawing the bow and maintaining stability during aiming, these muscles are key to a controlled shot. The latissimus dorsi also provides support to the lower back.

Abdominals (Core)

Never underestimate the importance of core muscles. A strong core is vital for successful archery and bowhunting, facilitating smooth bow drawing, better balance, and steady aiming. Beyond traditional sit-ups or crunches, numerous exercises can effectively strengthen the core.

To optimize your exercise routine for archery and bowhunting, seeking guidance from a licensed physical therapist or certified strength and conditioning specialist is highly recommended. They can tailor exercises to your individual needs and ensure that you perform them with proper form to avoid injury.

Now, let’s delve into the top 25 exercises that I recommend to increase draw weight and enhance your hunting prowess. These exercises have been carefully chosen to specifically target the mentioned muscle groups and help you achieve your archery goals safely and effectively.

By incorporating these exercises into your routine, you’ll be well on your way to improving your draw weight, boosting your overall performance, and becoming a more skilled archer or bowhunter.

25 Best Exercises to Increase Draw Weight

With regularity and dedication, you will witness progress as you become stronger, gradually increasing your draw weight, and ultimately transforming into a more proficient archer or bowhunter.

Remember, success in archery and bowhunting requires consistent effort and patience, so stay committed to your training, and the results will follow.

1. Push-ups

Start in a plank position with hands slightly wider than shoulder-width apart. Lower your body until your chest nearly touches the ground, then push back up to the starting position.

2. Lat Pulldowns

Sit at a lat pulldown machine with a wide bar attached. Grip the bar wider than shoulder-width and pull it down to your chest, squeezing your back muscles. Slowly release the bar back up.

3. Plank on Hands

Assume a push-up position with your hands directly below your shoulders. Keep your body in a straight line from head to heels, engaging your core. Hold this position for the desired duration.

4. Bent Over Rows

Hinge at the hips, keeping your back flat, and a staggered stance. One hand may provide support from a weight bench or rack. Grasp a dumbbell in one hand and perform a rowing motion. Focus on performing this movement in a slow and controlled manner by utilizing the back muscles.

5. Triceps Dips

Sit on the edge of a bench or chair with your hands gripping the edge. Walk your feet forward and lower your body down by bending your elbows. Push back up to the starting position.

6. Face Pulls

Attach a resistance band to a sturdy anchor point. Grab the band handles with both hands, palms facing inward. Pull the band towards your face while squeezing your shoulder blades together. Release with control.

7. Lunges

Stand tall, take a step forward with one leg, and lower your body until both knees are at 90-degree angles. Push back up to the starting position and repeat with the other leg. Add resistance by holding dumbbells at your side.

8. Bench Press

Lie on a flat bench, hold a barbell with an overhand grip, and lower it down to your chest. Push the barbell back up to the starting position.

9. Lateral Plank

Lie on your side with your elbow directly beneath your shoulder and your legs stacked on top of each other. Your body should form a straight line from head to heels. Engage your core muscles and lift your hips off the ground, supporting your body weight on your forearm and the side of your bottom foot. Your forearm should be perpendicular to your body. Repeat on both sides.

10. Banded ER (External Rotation) + Shoulder Flexion

Begin by securing a resistance band to a fixed point at waist height. Stand perpendicular to the anchor point, gripping the resistance band with one hand. Ensure your elbow is bent at a 90-degree angle and then rotate your arm away from your body. Once in this position, lift your arm straight ahead while actively resisting the tension of the band. Gradually lower your arm back to your side and then return to the starting position.

11. Superman’s – Back Extension

Lie face down with arms extended overhead. Lift your arms, chest, and legs off the ground simultaneously, squeezing your lower back muscles. Lower back down with control.

12. Biceps Curls

Stand with a dumbbell in each hand, palms facing forward. Curl the dumbbells towards your shoulders, squeezing your biceps. Lower the dumbbells back down slowly.

13. Prone I’s, Y’s, T’s

Lie face down on an incline bench with your arms hanging down. Raise and lower your arm in each direction: straight up (I), at an angle (Y), and out to the side (T).

14. Hammer Curls

Similar to biceps curls, but this time, hold the dumbbells with your palms facing inward (neutral grip) throughout the movement.

15. Medicine Ball Slams

Stand with feet shoulder-width apart, hold a medicine ball overhead, and slam it down to the ground with force. Catch the ball on the bounce and repeat.

16. Squats

Stand with feet hip-width apart, lower your body by bending your knees and pushing your hips back. Keep your chest up and back straight. Return to the standing position.

17. Deadlifts

Stand with feet hip-width apart, grip a barbell with an overhand grip, and lift the barbell by extending your hips and standing up tall. Lower the barbell back down with control. Keep the barbell close to your legs throughout the entire repetition.

18. Lateral Raises

Hold dumbbells at your sides with palms facing your body. Raise your arms out to the sides until they’re parallel to the ground. Lower with control.

19. Pectoral Fly’s

Lie on a flat bench with a dumbbell in each hand. Open your arms out to the sides, then bring them together in front of your chest. Lower with control. To really emphasize the pectoral muscles, rotate the arm so the pinky side of the hand approach each other at the top of the repetition.

20. Front Raises

Hold a dumbbell in each hand with palms facing your body. Raise your arms straight out in front of you until they’re parallel to the ground. Lower with control.

21. Renegade Rows

Assume a push-up position with a dumbbell in each hand. Row one dumbbell up towards your ribcage while stabilizing with the other arm. Alternate sides.

22. Seated Cable Rows

Sit at a cable row machine with your knees slightly bent. Grab the handles and pull them towards your torso, squeezing your back muscles. Release with control.

23. Shoulder Press

Sit on a bench with back support and hold dumbbells at shoulder height. Press the dumbbells overhead until your arms are fully extended. Lower with control.

24. Swiss Ball Pike Roll Outs

Start in a plank position with your feet on a Swiss ball. Engage your core and roll the ball towards your hands, lifting your hips into a pike position. Roll back to the starting position.

25. Farmer’s Carries

Hold an object in one hand at the side (as if carrying a bucket) while walking a certain distance. Repeat on both sides.

The list may seem lengthy, but the intention is to offer you a variety of exercises that you can incorporate into your daily routine to help achieve your goal of increasing draw weight.

It is not advisable to attempt all these exercises in a single session. Instead, I recommend selecting anywhere from 3 to 6 exercises and dedicating yourself to consistent practice.

5 BEST Exercises to Increase Draw Weight (at the gym)

These exercises are best to perform at a gym as they will require a barbell, free weights, and cable machines. As always, place emphasis on slow and controlled movements with appropriate form and technique.

Give these 5 exercises a try next time you’re at the gym:

1. Deadlifts: 4 sets of 6 repetitions.

2. Bent over rows: 4 sets of 8 repetitions.

3. Bench press: 4 sets of 6 repetitions.

4. Face pulls: 3 sets of 10 repetitions.

5. Seated cable rows: 4 sets of 8 repetitions.

Start with a light(er) weight until you master the form and technique. Strength improvements will occur much more rapidly while practicing proper form and technique, all while minimizing the risk of injury.

5 BEST Exercises to Increase Draw Weight (at home)

Gym memberships can be pricy and the inconvenience of going to a gym may deter some people. There are several great bodyweight exercises that can be done at home to increase draw weight.

Hop on the floor and give these 5 exercises a try today!

1. Push-ups: 4 sets of 12 repetitions.

2. Plank on hands: 3 sets of 45 second holds.

3. Prone I’s, Y’s, T’s: 3 sets of 8 repetitions. Hold a can of soup for added resistance.

4. Farmers carries: 5 sets of 30-50 feet in distance. A bucket or heavy object can be used.

5. Walking lunges: 3 sets of 8 repetitions each leg.

I like these 5 exercises to increase draw weight because they require very little gym equipment and I can knock them out in the time it takes some people to drive to the gym. As a busy father, this allows me to maintain consistency and my overall fitness.

Conclusion

When searching the internet for exercises to increase draw weight, you will probably come across thousands of options. The beauty of this process is that as long as you put in the effort and maintain consistency, you will undoubtedly become stronger and boost your draw weight.

As I’ve emphasized before, there’s no need to reinvent the wheel. Stick to the basics, perform them with proper form, and remain consistent in your training. By doing so, you’ll achieve your goals and keep progressing.

Keep moving forward!

About the Author

About the Author

Taylor Kuhlmann, PT, DPT, CSCS

Taylor Kuhlmann is a licensed physical therapist in Kansas, a certified strength and conditioning specialist accredited by the National Strength and Conditioning Association, and the founder of High Caliber Health. With a passion for guiding hunters and outdoor enthusiasts, Taylor focuses on enhancing their overall health and wellness, enabling them to experience the outdoors with reduced pain and enhanced performance.

Read more…

Pain in Bottom of Foot: Plantar Fasciitis

Pain in Bottom of Foot: Plantar Fasciitis

Pain in Bottom of Foot: Plantar Fasciitis


Table of Contents

Introduction

If you’ve been experiencing pain in the bottom of your foot, particularly near the heel, you may be dealing with a common condition called plantar fasciitis.

As a physical therapist and certified strength and conditioning specialist, I have witnessed the impact of plantar fasciitis on individuals seeking relief from foot pain.

In this blog post, we will explore the symptoms, self-assessment methods, effective exercises, and recommended footwear options to help you manage and alleviate plantar fasciitis.

Symptoms of Plantar Fasciitis

Plantar fasciitis is characterized by consistent symptoms that are easy to identify. Individuals suffering from this condition often face difficulties in walking, running, and engaging in their daily activities or hobbies.

Pinpoint Pain:

The most common symptom of plantar fasciitis is sharp, localized pain in the bottom of the foot, usually near the heel. This pain is often described as a stabbing or burning sensation, especially during activities that put stress on the plantar fascia, such as walking, running, or hiking.

Morning Pain:

Another characteristic of plantar fasciitis is experiencing significant pain during the first few steps in the morning. This discomfort arises due to the tightening and shortening of the plantar fascia overnight. As you start moving and the tissue warms up, the pain may gradually subside, only to resurface after prolonged periods of rest.

Pain after Prolonged Standing or Sitting:

Sharp, annoying pain in the bottom of the foot can occur after prolonged periods of standing or sitting. Prolonged standing can irritate the tissue along the bottom of the foot, leading to localized pain. Similarly, prolonged sitting results in tightening of the plantar fascia tissue, causing pain when you immediately stand and walk as the tissue is stretched from the shortened position.

Self-Testing for Plantar Fasciitis

While a professional diagnosis is recommended for an accurate assessment, you can perform a simple self-test known as the Windlass test to gauge the likelihood of having plantar fasciitis.


Windlass Test:

        • Sit on a chair with the affected leg crossed over the opposite leg.
        • Grasp the big toe of the affected foot with your hand and pull the toe up towards the shin. This movement of the big toe will stretch the plantar fascia tissue.
        • If you experience pain near the heel or along the arch of your foot during this movement, it suggests the presence of plantar fasciitis.

Monitoring Symptoms:

The consistent symptoms mentioned above (sharp, pin-point pain in the bottom of the foot, morning pain when walking, or pain with prolonged activities or sitting) are typical among people with plantar fasciitis.

Best Exercises for Plantar Fasciitis

To alleviate pain and promote healing, incorporating specific exercises into your routine can be highly beneficial. Here are a few exercises to consider:

1.  Calf Stretches:

Stand facing a wall, place your hands on the wall, and step one foot back while keeping it straight. Bend your front knee, lean forward, and feel the stretch in your calf and Achilles tendon. Hold for 30 seconds on each leg, repeating 3-4 times.

2.  Towel Stretch:

Sit on the edge of a chair with your legs extended in front of you. Loop a towel around the ball of your foot and gently pull it towards you while keeping your knee straight.

*Placing the towel around the toe will result in a greater stretch through the plantar fascia tissue which can be additionally helpful. Hold the stretch for 15-30 seconds, repeating 3-4 times on each foot.

3.  Plantar Fascia Massage:

Sit in a chair and place a tennis ball or a frozen water bottle on the floor. Roll the arch of your foot over the ball or bottle, applying moderate pressure. Perform this massage for 1-2 minutes on each foot, a few times a day.

4.  Single Leg Balance:

Stand barefoot on one leg. If needed, you can use a support surface and lightly touch it with your fingers for assistance. Try to maintain your balance on a single leg for a duration of 30-60 seconds.

During this exercise, visualize gripping the floor with your big toe as if you are pushing it down, while also maximizing the arch at the bottom of your foot. Repeat this exercise 3-5 times. Additionally, you can incorporate single leg balance into your daily activities such as brushing your teeth, cooking, or while at work.

5.  Eccentric Heel Raises:

Begin by raising yourself onto your tip-toes using both feet. Then, shift your bodyweight over to one foot and slowly lower your body down. This completes one repetition. Aim to repeat this exercise 8-12 times on each leg, and perform 3-4 sets in total.

6.  Single Leg Romanian Deadlift:

This exercise is more advanced but highly beneficial for various musculoskeletal conditions. To begin, stand on one leg with a slight bend in your knee.

Ensure that you maintain a good arch in your foot and press into the floor with your big toe, just like you did during the single leg balance exercise. Next, perform a hip hinge movement by reaching down towards the floor with your opposite hand until you feel a limited range of motion due to hamstring muscle tightness.

Slowly return to the starting position and repeat this movement 6-8 times for 3-4 sets. Once completed on one leg, repeat the exercise on the opposite leg.

Best Shoes for Plantar Fasciitis

Choosing appropriate footwear is crucial in managing plantar fasciitis.

Below are three recommended brands known for their supportive features that can help minimize flat feet or over-pronation:

Hokas:

Known for their maximum cushioning and shock absorption, Hoka shoes provide excellent support to the arch and heel, reducing stress on the plantar fascia.

Click here to check em’ out on Amazon!

Brooks:

Brooks offers a wide range of running shoes designed with ample cushioning and stability. They prioritize comfort and support, making them suitable for individuals with plantar fasciitis.

Click here to check em’ out on Amazon!

ASICS:

With a focus on stability and cushioning, ASICS shoes offer reliable arch support and shock absorption. They can help alleviate pressure on the plantar fascia during various activities.

Click here to check em’ out on Amazon!

As a physical therapist, these are the top three brands that I recommend to individuals who experience pain in their feet.

Personally, I wear the Brooks but have also enjoyed running trails, sidewalks, and country roads in the Hokas.

Although these brands are more expensive, I think the investment in a good quality shoe is justified!

Minimalist Shoes for Plantar Fasciitis

Minimalist shoes can also be effective at improving the strength and endurance of foot muscles, reducing the risk of developing plantar fasciitis.

Some recommended minimalist shoes are:

Vivobarefoot Primus:

Vivobarefoot Primus is a minimalist shoe that provides a barefoot-like experience with its thin and flexible sole. It promotes foot strength, mobility, and natural biomechanics, helping improve overall foot function.

The thin sole enhances sensory feedback and allows for better ground connection, improving balance and proprioception. Transitioning to Primus should be done gradually to adapt to the new movement patterns.

Click here to check em’ out on Amazon!

Xero Shoes Zelen:

Xero Shoes Zelen is a lightweight minimalist shoe that prioritizes natural foot motion. It features minimal cushioning and support, allowing for foot strength, mobility, and improved balance.

The thin and flexible sole provides a close-to-ground experience, offering enhanced sensory feedback and control over footwork.

Transitioning to Zelen should be approached gradually, and consultation with a healthcare professional is recommended, especially for individuals with specific foot conditions.

Click here to check em’ out on Amazon!

Minimalist shoes provide, as the name implies, minimal support, requiring the muscles themselves to support the foot and ankle, resulting in a stronger and more stable foot and ankle.

These can take some getting used to, so it’s important to gradually increase the amount of time spent in these shoes. 

Conclusion

Pain in the bottom of your foot can be a result of plantar fasciitis, a condition that affects many individuals. Recognizing the symptoms, conducting a self-assessment like the Windlass test, incorporating specific exercises, and investing in supportive footwear can assist in managing the pain and promoting healing.

Remember to consult with a healthcare professional for a proper diagnosis and personalized treatment plan.

Don’t let plantar fasciitis hold you back from enjoying a pain-free, active lifestyle.

Disclosure: as an amazon affiliate, I earn commissions from qualifying purchases made through the links provided on this website and blog posts, which help support its maintenance and content creation.

About the Author

About the Author

Taylor Kuhlmann, PT, DPT, CSCS

Taylor Kuhlmann is a licensed physical therapist in Kansas, a certified strength and conditioning specialist accredited by the National Strength and Conditioning Association, and the founder of High Caliber Health. With a passion for guiding hunters and outdoor enthusiasts, Taylor focuses on enhancing their overall health and wellness, enabling them to experience the outdoors with reduced pain and enhanced performance.

Related posts…