Hunting After a Total Knee Replacement | The Return to Hunting

Hunting After a Total Knee Replacement | The Return to Hunting

Introduction

Hunting is more than just a hobby; it’s a passion that often defines one’s connection to the outdoors. It’s about creating memories with family and friends, embarking on long road trips, experiencing heart-pounding moments as that target buck walks under the tree stand, and the satisfaction of putting food on the table.

However, for those who have undergone knee replacement surgery, the prospect of returning to the field may seem daunting.

In this guide, we’ll explore how you can navigate the challenges of hunting after a knee replacement, ensuring a safe and enjoyable experience in the great outdoors. 

Hunting After a Total Knee Replacement (TKA)

Recovery after a total knee replacement surgery occurs in distinct stages, each with its own set of challenges and milestones. Understanding what to expect during each phase can help you prepare mentally and physically for the journey ahead, ultimately setting you up to return to the field for the upcoming hunting season.

Breakdown of Recovery Stages:

0-2 weeks:

      • Immediately following surgery, focus will be on pain management and initial mobility exercises.
      • Patients typically use a front wheeled walker or a cane during this stage of recovery.
      • Physical therapy may begin to regain range of motion and strength in the knee.

2-4 Weeks:

      • Pain and swelling gradually decrease, allowing for increased mobility.
      • Patients may transition from using assistive devices to walking with a cane or independently.
      • Physical therapy intensifies to improve muscle strength and joint stability.

4-6 Weeks:

      • Continued progress in mobility and strength.
      • Patients may start to engage in more functional activities, such as stair climbing and light household chores.
      • Flexibility exercises become more advanced to improve joint mobility.

6-8 Weeks:

      • Many patients begin to resume light recreational activities, under the guidance of their healthcare provider.
      • Physical therapy focuses on functional activities specific to daily life and recreational interests.
      • This is when hunting-related activities can resume, such as drawing and shooting a bow and arrow or a gradual return to walking on uneven surfaces.

8+ Weeks:

      • By this stage, most patients have regained significant mobility and strength in the operated knee.
      • Focus shifts towards gradually increasing activity levels and returning to more strenuous recreational activities, such as hunting.
      • Certainly, the type of game you are hunting may require a longer recovery time, such as elk hunting in the mountains.

Understanding these milestones can help you set realistic expectations for your recovery journey and plan accordingly for your return to hunting.

Managing expectations for physical abilities during each stage.

Walking After a Total Knee Replacement

Regaining the ability to walk comfortably and confidently is a crucial aspect of recovery after a total knee replacement (TKA).

Here’s what you need to know about walking post-surgery:

1. Early Mobility:

In the immediate post-operative period, you’ll be encouraged to start moving as soon as possible. Initially, this may involve assisted walking with the help of a walker.

Early mobility starts the same day of surgery and will continue for the duration of the recovery process.

2. Gradual Progression:

As your knee heals and strength improves, you’ll gradually transition from assisted walking to walking independently.

Your physical therapist will guide you through exercises to improve balance, gait mechanics, and overall mobility.

3. Weight-Bearing:

Weight-bearing exercises are essential for rebuilding strength in the muscles surrounding the knee joint. Your therapist will prescribe specific exercises to gradually increase the amount of weight you put on your operated leg during walking.

Performing weight-bearing exercises early in the recovery process will help desensitize the central nervous system and assist in speeding up the recovery process.

4. Proper Form:

Paying attention to your walking technique is important to reduce the risk of developing bad habits, poor gait mechanics, and promote optimal healing.

Focus on maintaining proper posture, engaging your core muscles, and taking smooth, controlled steps.

5. Pacing Yourself:

While it’s natural to want to push yourself to return to normal activities quickly, it’s important to listen to your body and avoid overexertion.

Gradually increase the duration and intensity of your walks as your knee tolerates. Your body needs adequate rest for optimal recovery.

6. Terrain Considerations:

When walking outdoors, choose level, stable surfaces to minimize the risk of falls or uneven terrain that could strain your knee. Start with shorter walks and gradually progress to more challenging terrain as your confidence and strength improve.

Walking on uneven terrain can start when you’re walking independently with no pain or instability for two weeks on even surfaces.

By prioritizing rehabilitation exercises and gradually increasing your activity levels, you can regain the ability to walk comfortably and confidently after a total knee replacement, setting the stage for a successful return to hunting.

Considerations for Hunting After a Total Knee Replacement

As we know, hunting is a physically demanding activity that requires careful planning and consideration, especially after undergoing a total knee replacement (TKA).

Here are some key factors to keep in mind when preparing to return to hunting:

1. Type of Game:

Consider the type of game you plan to hunt and how it may impact your knee. For example, hunting small game may involve more walking and agility, while hunting larger game may require more strength for carrying and dragging.

Sitting in a ground blind while hunting whitetail will occur way before you’re ready to trek the Rocky Mountains in search of elk.

2. Terrain:

Assess the terrain of your hunting area and its suitability for your post-surgery mobility level. Flat, even terrain may be easier to navigate initially, while rough or steep terrain may pose greater challenges.

Consider access points to your honey hole and set up ground blinds that are more easily accessible to improve safety when returning to the field.

3. Ground Cover:

Take into account the type of ground cover you’ll encounter while hunting. Avoid areas with dense vegetation or uneven surfaces that could increase the risk of tripping or putting strain on your knee.

Navigating thick brush while pheasant hunting or steep creek banks while turkey hunting will likely give the wildlife an advantage.

4. Distance of Walking:

Determine how much walking you’ll need to do during your hunting trip and plan accordingly. Start with shorter outings and gradually increase the distance as your knee strength and endurance improve.

5. Lifting and Carrying:

Consider how you’ll manage lifting and carrying gear, game, or equipment. Invest in lightweight gear and consider using equipment such as game carts or backpacks with padded straps to distribute weight evenly and reduce strain on your knee.

6. Pacing Yourself:

Pace yourself during your hunting outings to avoid overexertion and minimize the risk of fatigue or injury. Take breaks as needed, stay hydrated, and listen to your body’s cues.

7. Products:

Products such as over-the-counter knee braces or compression sleeves can enhance your sense of stability and alleviate pain or inflammation.

Incorporating these braces or sleeves into your hunting gear can heighten awareness of the knee joint, thus enhancing your ability to traverse terrain safely and minimizing the risk of injury.

Products to Help Reduce Pain After a Total Knee Replacement

Managing pain and discomfort is an important aspect of recovery after a total knee replacement (TKA). While rehabilitation exercises and proper rest are crucial, there are also various products available to help alleviate pain and support your knee during the healing process.

Here are some of my top recommended products:
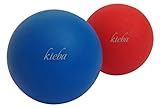
1. Knee Sleeve:

A knee sleeve provides compression and support to the knee joint, helping to reduce swelling and inflammation.

Look for a sleeve specifically designed for post-surgery use, with adjustable straps for a customized fit.
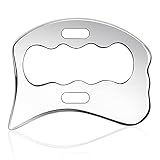
2. Kinesiotape:

Kinesiotape can be applied to the skin around the knee to provide support and stability without restricting movement. It may help reduce pain and improve circulation, promoting faster healing.

3. Ice Compression:

Ice compression therapy combines cold therapy with compression to reduce swelling and relieve pain.

There are various ice compression wraps and packs available that can be applied directly to the knee for targeted relief.

4. Boots:

Specialty boots designed for post-surgery recovery can provide additional support and stability to the knee while walking or resting. These boots often feature adjustable straps and padding for comfort.

5. Exercise Equipment:

Investing in exercise equipment such as resistance bands, dumbbells, or stationary bikes can help facilitate rehabilitation exercises prescribed by your physical therapist.

These tools can improve strength, flexibility, and range of motion in the knee joint to maximize your performance while hunting.

Before using any of these products, consult with your healthcare provider or physical therapist to ensure they are appropriate for your specific condition and stage of recovery.

By incorporating these supportive products into your recovery routine, you can effectively manage pain and discomfort after a total knee replacement, allowing for a smoother rehabilitation process.

With proper rehabilitation and regular exercise, you will likely be able to return to hunting with no extra equipment necessary.

Exercises to Do 6 Months After a TKA

Six months post total knee replacement (TKA), you’ve likely made significant progress in your recovery journey.

At this stage, you can focus on more advanced exercises to further strengthen and stabilize your knee joint.

Here are some exercises recommended for this stage of rehabilitation:

1. Leg Press:

Using a leg press machine or resistance bands, perform leg presses to strengthen the muscles around your knee. Start with light resistance and gradually increase as tolerated.

2. Lunges:

Perform forward lunges or stationary lunges to improve balance, stability, and strength in your legs. Ensure proper form by keeping your knees aligned with your ankles and avoiding overextension.

3. Step-ups:

Step onto a low platform or step with your operated leg, then step back down. This exercise helps improve strength and function in the muscles used for stair climbing and walking.

4. Single-leg Balance:

Stand on your operated leg and maintain your balance for 30 seconds to 1 minute. Use support as needed, such as holding onto a stable surface or using a chair for assistance. Progress the intensity by standing on an uneven surface, such as a pillow or couch cushion, to improve lower extremity proprioception, strength, and balance.

5. Calf Raises:

Stand with your feet hip-width apart and rise up onto your toes, then lower back down. This exercise targets the calf muscles and helps improve ankle stability.

6. Squats:

Perform squats using your body weight or holding onto a stable surface for support. Focus on maintaining proper form, keeping your knees aligned with your ankles and not letting them collapse inward. Start with mini-squats and progress to regular squats with resistance as tolerated.

7. Deadlifts:

This exercise offers several benefits to hunters. Deadlifts strengthen the lower back, legs, and core muscles, enhancing stability and endurance necessary for long treks through rugged terrain. Additionally, deadlifts improve overall functional strength, aiding in tasks like carrying heavy gear or dragging game during hunts.

Remember to progress gradually with these exercises and listen to your body. If you experience any pain or discomfort, stop the exercise and consult with your healthcare provider. Consistency and patience are key to continued progress in your rehabilitation journey after total knee replacement surgery.

Conclusion

Hunting after a knee replacement is a realistic and achievable goal with careful planning, preparation, and dedication to your rehabilitation journey. By understanding what to expect after total knee replacement surgery, prioritizing mobility and strength exercises, and making use of supportive products, you can minimize pain and discomfort while enjoying the great outdoors.

It’s essential to listen to your body, pace yourself during hunting outings, and make adjustments as needed to ensure a safe and enjoyable experience. Consulting with your healthcare provider or physical therapist throughout the recovery process is crucial for personalized guidance and support.

Remember that every individual’s recovery timeline and capabilities are unique, so it’s important to approach hunting after knee replacement with patience and realistic expectations. With proper care and attention, you can continue pursuing your passion for hunting and outdoor adventure for years to come.

Stay focused on your goals, stay safe, and most importantly, enjoy the journey.

About the Author

About the Author

Taylor Kuhlmann, PT, DPT, CSCS

Taylor Kuhlmann is a licensed physical therapist in Kansas and a certified strength and conditioning specialist accredited by the National Strength and Conditioning Association.

As the founder of High Caliber Health, Taylor has a passion for guiding hunters and outdoor enthusiasts, focusing on enhancing their overall health and wellness to enable them to experience the outdoors with reduced pain and enhanced performance.

Why Does My Neck Hurt After Archery?

Why Does My Neck Hurt After Archery?

Why Does My Neck Hurt After Archery?

Introduction

Neck pain after archery can be caused by various reasons and, more often than not, can be an easy fix. 

Neck pain from muscle tightness after archery is commonly described as a deep, dull and achy sensation. These individuals often report muscle tightness or knots along the upper neck and shoulder, or just inside the shoulder blade, after shooting a high volume of arrows. 

Headaches that originate at the base of the skull and neck stiffness can be secondary to muscle tightness in the neck.

In this article I highlight a few stretches that can alleviate neck muscle tightness.

In more severe cases, neck pain can radiate into the shoulder and/or cause numbness and tingling into the shoulder and arm. This pain can be a little more tricky to tackle but is definitely something that can improve with targeted exercise and specific stretches. 

In this blog post I will identify the primary reasons that cause neck pain after archery AND recommend products that can help alleviate neck pain!

Top 7 Causes of Neck Pain After Archery

Neck pain after archery can arise from various factors. If left untreated, the ongoing stress on these areas can intensify, potentially impairing your ability to shoot a bow. 

Working regular strength and mobility exercises into a daily routine can help reduce the risk of developing neck pain after archery. Filming and analyzing draw technique can also help identify any flaws that may contribute to increased pain.

I have created other blog posts that include exercises and stretches to help reduce neck pain after archery, which you may find helpful. 

For now, let’s take a look at the top 7 causes of neck pain after archery.

1. Upper Trap Muscle Tightness

Drawing a bow with bad archery form can lead to elevated shoulders, causing tightness and increased stress along the upper trapezius muscle. Muscle tightness or knots can be felt by placing the hand on top of the shoulder and squeezing the muscle. If your upper trap is tight, this squeezing can reproduce your symptoms and be quite uncomfortable. 

The upper trapezius muscle starts at the base of the skull and attaches to the tip of the shoulder blade. The muscle is responsible for elevating and upwardly rotating the shoulder blade, as well as tilting the head and neck to the side. Upper trap muscle tightness can cause cervicogenic headaches, neck pain, or shoulder pain in archers. 

It is important to take a step back and evaluate body positions throughout normal daily life, especially with work-related tasks. Individuals with jobs that require sitting at a computer desk, talking on the phone, or manual labor jobs that require repetitive use of the arms can develop upper trap muscle tightness. 

Making a few modifications with normal daily tasks, like improving work space ergonomics, can certainly reduce the risk of developing neck pain and upper trap muscle tightness after archery.

2. Head Tilt at Full Draw

The angle of your head in relation to the bowstring while at full draw can impact your neck. Tilting the head sideways to find the peep with every consecutive shot is typically secondary to inadequate draw length. This abnormal positioning of the neck increases the stress to muscles, intervertebral discs, and nerves of the cervical spine.

During archery, a right lateral head tilt is combined with neck rotation in the opposite direction while aiming at the target. This repetitive motion of the spine can result in facet arthropathy, muscle tightness, or nerve impingement.

The facet joint is the point where two vertebrae in the spine connect. In the cervical spine, the specific alignment of these joints allows for bending, twisting, and overall spinal alignment. Facet arthropathy arises when these joints become inflamed and painful. Pain is typically felt when the spine is rotated and extended, placing stress on these specific joints. 

The upper trapezius muscle is involved with tilting the head to the side. This repetitive motion to at full draw can over-stress the muscle and contribute to muscle tightness and pain.

Poor archery form

Tilting and rotating the head also places the spine in a position that reduces the space through which nerves pass. Compression on the nerves in this region can lead to symptoms such as muscle weakness, numbness, and tingling along the arm, accompanied by neck pain. In some instances, this numbness and tingling may extend to the hand and fingers.

Sometimes small adjustments to bow setup can help improve archery technique and reduce the risk of developing neck pain caused by a head tilt at full draw.

3. Impaired Shoulder and Spinal Mobility

Neck pain after archery often stems from restricted mobility in the shoulder, neck, or mid-back. Drawing from my experience as a physical therapist, I’ve observed that mobility deficits are commonly the cause of neck pain in individuals over 50 years old, although it can affect us young bucks, as well.

Impaired mobility in the spine, scapula, or shoulder joint can prompt compensatory patterns while drawing and shooting a bow. Poor archery form and technique can result in abnormal stress on the muscles involved in these actions.

Assessing range of motion at home is easy to do. We’ll cover this in a video on YouTube. If you have a limited range of motion in the shoulder or spine, it may be good to assess posture (or positioning) while shooting a bow, as this can be an easy and quick-fix.

Body positioning has a direct correlation to the available range of motion of the shoulder and neck. Here is a quick way to do this while sitting where you are – simply hunch forward and round your upper back. From here, try to raise your arms or turn your head. Then, sit upright with good positioning, repeat the head/neck and shoulder movements and see how different the movements are. This goes to show why appropriate positioning and shooting technique with archery is very important. 

4. Muscle Weakness

Weakness in the muscles of the shoulder and scapula contributes to abnormal stresses along the shoulder and neck. The scapula and rotator cuff muscles, if weak, can be significant factors in experiencing pain after engaging in archery.

It’s not uncommon for individual’s to exhibit overall strength, such as lifting heavy loads in the shop or hitting a heavy bench press, yet still have underlying weakness in the muscles of the shoulder. The presence of robust strength does not necessarily eliminate the possibility of weakness in the shoulder girdle.

Key muscles that play a crucial role in neck pain after archery include the rhomboids, trapezius, rotator cuff, and serratus anterior muscles.

Targeted exercises can effectively address muscle weakness in the muscles involved in drawing and shooting a bow.

We’ve highlighted a few of these exercises in another blog post.

5. Postural abnormalities

I often hear people express concerns about their posture, with statements like “my posture is terrible” or “my mom thinks my posture is trash.”

Defining what constitutes “normal” posture can be challenging, and it’s crucial to understand that maintaining a single posture for an extended period may not be ideal. Instead, the key is to engage in regular movement and avoid prolonged positions. If you can comfortably transition in and out of various postures, it’s less likely that you have what is commonly perceived as “bad posture.”

In archery and bowhunting, maintaining precise positioning is critical for achieving proper form and technique. Rather than emphasizing the term “posture,” I prefer to highlight the significance of proper positioning of the head and neck, mid-back, and shoulders, as these elements play a key role in executing the movements necessary for drawing and shooting a bow.

Maintaining body positions for any extended length of time can result in muscle imbalances and postural (or positional) deficits. 

Muscle tightness in the pectoral muscles, an exaggerated thoracic kyphosis (hunchback), and tight hip flexors can lead to suboptimal positioning during the process of drawing and shooting a bow. These muscle imbalances significantly elevate the risk of injury while shooting a bow.

Frequent movement is essential to reduce the risk of developing muscle imbalances. Incorporating regular strength training and mobility exercises into your routine can effectively mitigate the negative effects associated with these imbalances.

6. Previous Shoulder Injury

It is important to consider all previous injuries when it comes to identifying the underlying issue of neck pain after archery. Previous shoulder injuries from the glory days of high school or college football can resurface with the repetitive movement of drawing and shooting a bow. 

Ladies, you’re not off the hook either. If hypermobility, characterized by excessive range of motion, is a concern, incorporating strengthening exercises can be beneficial. Engaging in targeted strengthening exercises is crucial for enhancing stability and relieving neck and shoulder pain linked to archery or comparable activities.

For those who have a history of shoulder injuries, it is essential to focus on specific exercises, particularly those targeting the rotator cuff and scapular muscles. This targeted approach aims to optimize joint health and overall performance.

Neglecting a prior shoulder injury could lead to heightened stress on the neck or mid-back, potentially serving as a contributing factor to neck pain following archery.

7. Cervical arthritis

Conditions such as spondylosis, degenerative disc disease, stenosis, and bulging discs are frequently observed in individuals aged 40 and above. Studies reveal that approximately 60% of those over 40 have degenerative disc disease, while the figure rises to over 90% for individuals over 60. Remarkably, many individuals with these conditions experience no pain and are classified as “asymptomatic.”

This proves that these changes are inherent aspects of the natural aging process and are commonly found in the majority of individuals as they advance in age.

Statistics for degenerative disc disease

Neck pain may arise from the natural changes in the spine, but adopting a thoughtful approach and consistently engaging in physical activity can help alleviate it.

It’s important to recognize that medication, injections, and surgery don’t always provide the solution. Adjusting aspects of the draw setup, such as draw weight and length, can effectively reduce stress on the neck, lessening pain after archery.

Incorporating specific exercises and stretches into your routine can also counteract the negative effects of natural aging on the spine.

Don’t let a medical diagnosis prevent you from doing the things you enjoy doing. Instead, take a step back and see what things you can modify and do differently to continue enjoying life to the fullest.

Top Products to Reduce Neck Pain

If you’ve stretched and stretched your neck without much pain relief, then it may be time to consider another option. Sometimes those tight neck and shoulder muscles need a little more attention and these products can do exactly that!

Below I have included a few product recommendations that I use in the physical therapy clinic to help reduce muscle tightness, joint stiffness, and pain. These products are easily found on Amazon and as an Amazon Affiliate, I earn from qualifying purchases at no extra cost to you.

All of these products are small, lightweight, and can reduce neck pain. Throw them in your travel bag so you can reduce muscle soreness after your next long hunt!

Lacrosse ball

A deep tissue massage is a technique that involves applying firm pressure and slow strokes to target deeper layers of muscles and connective tissue. A lacrosse ball is commonly used to address chronic muscle tension, adhesions (knots), and areas of discomfort. 

Using a lacrosse ball to apply pressure to muscles assists in releasing tension along the fascia (covering of muscles), reduces trigger point activity, increases blood flow, and stimulates a relaxation response. All of these benefits can decrease muscle tightness and pain.

If you enjoy the sensation of a deep tissue massage, then this technique might be perfect for you! 

Trigger point cane

A trigger point release is a therapeutic technique used to alleviate muscle tightness and discomfort associated with trigger points, which are hyperirritable spots within tight bands of skeletal muscle fibers. These points can cause local pain or refer pain to other areas of the body.

A trigger point release aims to deactivate these points and promote muscle relaxation. There are various methods to reduce trigger point activity, and one common approach is with the use of a trigger point cane.

This tool assists you in reaching those hard-to-reach muscles along the neck and back. 

Massage gun 

A massage gun is like a little handheld jack hammer that works by providing a percussive massaging technique to target muscles. This device offers adjustable speed settings, which allows users to control the intensity and depth of the massage. The rapid pulsations from the massage gun stimulate blood flow and relaxation to the targeted area.

Although a little more expensive, I believe a massage gun is worth the investment. 

TENS Unit

A TENS unit works by delivering low-voltage electrical impulses through electrodes placed on the skin. These electrodes are positioned on or near the area experiencing pain or discomfort. These electrical pulses create a tingling or buzzing sensation, which can effectively override or modulate pain signals traveling to the brain. This mechanism is thought to stimulate the production of endorphins, the body’s natural painkillers, providing relief from various types of pain.

The device allows users to adjust the intensity, frequency, and duration of the electrical impulses, offering a customizable approach to managing pain. TENS units are commonly used for conditions such as chronic pain, arthritis, and muscle soreness, providing a non-invasive and drug-free method for alleviating discomfort. 

Conclusion

By understanding and addressing these factors, making modifications where needed, and consistently engaging in appropriate exercises, you can continue to pursue your passion while prioritizing your health and well-being. Don’t let a diagnosis define your limitations; instead, take proactive steps to continue embracing the activities you love.

Source:

About the Author

About the Author

Taylor Kuhlmann, PT, DPT, CSCS

Taylor Kuhlmann is a licensed physical therapist, certified strength and conditioning specialist accredited by the National Strength and Conditioning Association, and the founder of High Caliber Health.

With a passion for guiding hunters and outdoor enthusiasts, Taylor focuses on enhancing their overall health and wellness, enabling them to experience the outdoors with reduced pain and enhanced performance.

Archer’s Elbow: Tips for Managing Lateral Epicondylitis

Archer’s Elbow: Tips for Managing Lateral Epicondylitis

Archer’s Elbow: Tips for Managing Lateral Epicondylitis

Introduction

As archers and bowhunters, we’re all familiar with the thrill of drawing a bow, locking onto a target, and experiencing that adrenaline rush as the arrow finds its mark. Yet, if persistent elbow pain has cast a shadow over this thrill, we understand the frustration and discomfort it brings.

In this blog post, we’ll delve into a prevalent concern for archery enthusiasts: elbow pain, specifically lateral epicondylitis, and explore effective strategies to manage it, ensuring continued hunting pursuits with reduced discomfort.

Lateral epicondylitis, commonly known as tennis elbow, is a frequent issue for bowhunters. However, with a well-structured and consistent routine incorporating progressive exercises, this condition can be addressed, allowing a full return to the joy of bowhunting with confidence and less pain.

Understanding Lateral Epicondylitis

Lateral epicondylitis, commonly known as “tennis elbow,” arises from the repetitive strain placed on the forearm extensor muscles.

For passionate bowhunters, the repetitive motion of drawing and releasing the bowstring can lead to micro-tears in the forearm’s muscle and tendon junction, resulting in the persistent pain characteristic of lateral epicondylitis.

This condition is characterized by pinpoint tenderness at the lateral epicondyle of the humerus, located just above the elbow joint on the outer side of the arm—hence the term “lateral.”

Bowhunters, particularly feeling the impact in the elbow of their draw (or dominant) arm, endure this discomfort due to repetitive stress on the forearm extensor muscles, particularly the extensor carpi radialis brevis muscle, though other muscles may also be involved.

Recognizing the specific muscles at play is key for crafting an effective treatment plan, a task in which a skilled physical therapist plays a crucial role. Collaborating with a physical therapist not only helps pinpoint the exact muscles contributing to the elbow pain but also establishes the groundwork for a personalized and efficient recovery strategy.

It is essential to identify the root cause of the pain rather than merely addressing the symptoms. This approach expedites the recovery process and ensures a swift return to the tree stand, unencumbered by the constraints of discomfort.

A knowledgeable physical therapist becomes an indispensable ally, not only in recognizing lateral epicondylitis symptoms but also in guiding individuals toward a comprehensive and enduring recovery.

Recognizing the Symptoms

To alleviate discomfort in the elbow, it’s crucial to be aware of specific signs and symptoms linked to lateral epicondylitis. These indicators can manifest swiftly after an extended practice session or gradually over time as the muscles endure repetitive stress.

1. Pain with Gripping and Shooting

Pain associated with gripping and shooting is commonly centered on the outer part of the elbow and may extend into the forearm during these activities.

The sensation can vary, ranging from sharp and stabbing to a more persistent, achy dullness along the affected forearm and elbow. Notably, this discomfort is not limited solely to moments involving archery; it can manifest during everyday activities such as brushing teeth, holding a cup, or typing on a computer.

There are effective strategies to help manage and alleviate this discomfort. We’ll explore these in a few minutes.

2. Decreased Elbow Range of Motion

Pain can significantly impact muscles and tendons, leading to a cascade of effects that compromise the range of motion at the elbow. When discomfort arises, muscles and tendons may tense up, creating tightness that restricts the natural movement of the joint.

This decreased flexibility not only hampers the fluidity of motion but can also trigger compensatory patterns to cope with the pain. 

In the context of shooting a bow, these compensations can manifest as altered body mechanics, potentially placing undue stress on other muscle groups and joints. Such compensation patterns not only compromise the precision required for accurate shooting but also elevate the risk of injury.

The strain imposed on the musculoskeletal system, particularly the tendons and associated structures, increases the vulnerability to conditions like tendinopathy and other overuse injuries, such as lateral epicondylitis. 

Addressing pain promptly and implementing strategies to restore proper range of motion is crucial for maintaining optimal performance and minimizing the risk of injury when engaging in activities like bow shooting.

3. Decreased Grip Strength

Grip strength serves as a valuable predictor of overall strength and conditioning, as well as a “useful indicator of overall health,” a point emphasized in this comprehensive literature review.

For individuals grappling with lateral epicondylitis, a decrease in grip strength is a significant concern, second only to the pain experienced at the lateral elbow.

If decreased grip strength occurs, a release with a wrist strap emerges as a beneficial solution. By employing such a release, the demand on the wrist and finger extensor musculature decreases, subsequently reducing stress on the hand, wrist, and finger extensor muscles.

Neglecting the pain at the lateral elbow can lead to strength deficits that hinder success in archery and bowhunting. Don’t let lateral epicondylitis stand in the way of tagging your target buck this winter.

4. Pain at the Lateral Elbow

As anticipated, lateral epicondylitis can be quite painful and, understandably, it occurs most frequently in the dominant arm. This observation is supported by the American Academy of Orthopaedic Surgeons.

While lateral epicondylitis commonly impacts the draw arm for bow hunters, it’s important to note that it can indeed affect both arms. The repetitive actions of gripping and drawing the bow contribute to the development of lateral epicondylitis symptoms.

5. Pain with Extending Index and Middle Fingers

A practical method for assessing whether lateral epicondylitis is the underlying cause of elbow pain involves the use of Maudsley’s test. This straightforward and commonly employed clinical tool helps determine if an individual’s pain corresponds to lateral epicondylitis.

To conduct the Maudsley’s test, resist the extension of the middle (3rd) finger of the hand. This resisted movement places stress on the extensor digitorum muscle and tendon, typically causing discomfort at the lateral epicondyle of the humerus, just above the outer part of the elbow. A “positive” result occurs when the test reproduces pain at the lateral elbow.

It’s important to note that this blog post is intended for educational purposes only and should not be considered a diagnostic tool or a substitute for medical advice. If you have concerns about your symptoms, it is recommended to consult with your local primary care physician.

Now that we have identified the symptoms and understood the problem, let’s explore practical tips for effectively managing and alleviating elbow pain.

Effective Treatments for Lateral Epicondylitis

Various treatment options are available to alleviate elbow pain caused by lateral epicondylitis. It’s essential to recognize that different individuals respond uniquely to these treatments. I often emphasize to my patients that what proves effective for one person may not yield the same results for another.

However, in the case of lateral epicondylitis, a gradual exercise program focusing on the strengthening of the wrist and finger extensor musculature, along with comprehensive arm strengthening, tends to yield the best results and long-term outcomes.

Let’s explore a few treatment options that have demonstrated efficacy in reducing pain associated with lateral epicondylitis.

1. Ice Massage

Ice massage proves highly effective in managing lateral epicondylitis pain, primarily because the discomfort is often localized to a specific area. This method is particularly beneficial for addressing pain in smaller regions of the body, and lateral epicondylitis typically responds well to the analgesic effects of ice.

Here’s a simple way to perform an ice massage:

Fill a Styrofoam cup about ¾ full with water and place it in the freezer. Once frozen, tear off the bottom of the cup to expose the frozen ice. Hold the top of the Styrofoam cup (rather than the ice itself) while massaging the affected area for 5-10 minutes.

An ice massage typically progresses through four phases:

1. Cold: The initial sensation is obviously the cold.

2. Burning: As you rub the ice in small circles, the area may feel like it’s burning.

3. Aching: Following the burning sensation, an ache may develop. Keep going!

4. Numbness: The final phase during an ice massage. Ah! Finally, finished.

These phases can be remembered by the acronym CBAN (Cold, Burning, Aching, Numbness). The entire ice massage process usually takes 5-7 minutes, making it a convenient option for those with busy schedules or a lack of patience for longer ice pack sessions.

These reusable ice cups available on Amazon can help save money!


2. Cross-Friction Massage

Optimal healing relies on a sufficient blood supply, and increased blood flow is key to effective pain relief and recovery in musculoskeletal conditions. Blood carries essential oxygen and nutrients to the tissues, fostering the healing process.

A cross-friction massage is a great method to enhance blood flow to the wrist and finger extensor musculature. These muscle fibers run lengthwise along the forearm. To stimulate blood flow effectively, perform a gentle massage perpendicular to the direction of these fibers, promoting healing.

Here’s how to conduct a cross-friction massage:

1. Apply a small amount of coconut oil or unscented lotion to the affected area.

2. Use a blunt object, such as the handle of a butter knife, to apply pressure in a perpendicular direction to the muscle fibers of the wrist and finger extensor musculature.

3. Apply firm pressure and rub back-and-forth for 3-5 minutes, or as tolerated.

It’s important to note that increased redness in the treatment area is a normal response and indicates an increase in blood flow— a positive sign for healing. When done correctly, this technique should not cause bleeding or heightened pain.

Tools like these are VERY handy for massage techniques.


3. Wrist Extension Isometrics

Isometric exercises involve holding a weight in a fixed position, causing the muscle to work without any movement in the arm, hand, or wrist.

Unlike concentric and eccentric muscle contractions where the muscle fibers shorten or lengthen, isometric exercises keep the muscle in a stationary state.

This type of muscle contraction is generally non-painful, applying sufficient stress to the muscle and tendon to stimulate blood flow and kickstart the healing and strengthening processes.

Here’s how to perform wrist extension isometric exercises:

1. Place your forearm on a table with the hand and wrist hanging off the side.

2. Hold a dumbbell or hammer in your hand, keeping the wrist up parallel to the forearm.

3. In this position, the wrist extensor musculature engages in an isometric contraction while holding the weight in a static position.

4. Hold this position for 30 seconds, then rest for 1-2 minutes, and repeat this process 5 times.

It’s crucial to emphasize that pain should diminish with each repetition. Gradually increase weight or resistance within the bounds of discomfort tolerance.

Based on past experiences, individuals often mention experiencing mild to moderate discomfort during the initial repetition, which tends to decrease to a mild level in subsequent repetitions.

4. Wrist Flexion Isometrics

The wrist flexion isometric exercise is performed in a position similar to the wrist extensor isometric exercise, but with the palm turned up towards the ceiling.

Here’s how to do the wrist flexion isometric exercise:

1. Place your forearm on a table with the hand and wrist hanging off the side, palm facing up.

2. Hold a dumbbell or hammer in your hand with the palm facing up.

3. Perform an isometric contraction by holding the weight in a static position for 30 seconds.

4. Rest for 1-2 minutes and repeat this process 5 times.

It’s essential not to overlook the other muscles in the forearm during the recovery process. Incorporating exercises for wrist flexion and shoulder movements is crucial for achieving a comprehensive and full recovery.

5. Eccentric Exercises

Eccentric exercises are highly effective in alleviating symptoms associated with lateral epicondylitis. In eccentric muscle contractions, the muscle fibers lengthen while maintaining control over resistance throughout the entire range of motion.

These exercises have demonstrated effectiveness in enhancing strength, making them particularly advantageous for addressing tendinopathy and diverse musculoskeletal conditions.

To perform an eccentric muscle contraction for the wrist extensor musculature:

1. Place your arm on a table with the hand hanging just off the side, similar to the position for the wrist extension isometric exercise.

2. Hold a dumbbell or hammer in your hand with the palm facing the floor.

3. Use the opposite arm to assist in extending the wrist and lifting the weight towards the ceiling, keeping the forearm flat on the table.

4. Once you reach full wrist extension, release the weight with the opposite hand and slowly lower it in a controlled manner.

5. Utilize the opposite arm to assist the hand and wrist back to the starting position.

6. Repeat this process 12 times, rest for 1-2 minutes, and perform 3-4 sets.

It is advisable to advance to eccentric exercises as early as feasible, often guided by pain levels. An all in one dumbbell set is highly recommended for home gyms – and this adjustable dumbbell set is the best on the market. 


6. Wrist Flexion/Extension Stretches

Lateral epicondylitis can lead to tightness in the wrist extensor musculature, restricting movement in the hand, wrist, or elbow. Gentle and progressive wrist flexion/extension stretches are crucial for promoting healing in this area.

Start with wrist flexion/extension stretching with the elbow bent. As pain and soreness improve, progress to stretching with the elbow straight. Use the opposite upper extremity to flex and extend the wrist, adjusting to your comfort level.

Hold each stretch for 15-20 seconds, repeating 2-3 times. Incorporate these stretches several times throughout the day, based on your tolerance.

My personal routine begins with a brief cross-friction massage to enhance blood flow and warm up the tissue. Subsequently, I engage in isometric exercises targeting both the wrist extensor and flexor muscles. If I observe improvement in pain, I may progress to wrist extension exercises. Once I achieve a satisfactory muscle pump through these exercises, I conclude the session with a cool-down, incorporating static stretches, each held for 10-15 seconds.

Useful Products for Bowhunters

While strengthening and stretching exercises stand as the primary treatment for lateral epicondylitis, several products can assist archers in alleviating elbow pain, enabling them to continue enjoying bow shooting and hunting season with reduced discomfort.

1. Epicondylar Counterforce brace

These affordable braces enhance comfort during activities that aggravate lateral epicondylitis, like shooting a bow.

Placed perpendicular to the muscle fibers at the wrist extensor musculature’s muscle belly (1-2 inches below the elbow), they offer support and reduce strain during shooting.

Counterforce braces absorb and redistribute forces along the wrist extensor musculature, reducing pain and promoting healing.

Caution: Avoid overtightening to prevent further pain and nerve injury.

2. Alternative Release with Wrist Strap

Compound bow shooting requires the use of a release aid, and preferences vary. Index finger releases, which come with a wrist strap, and handheld, hinge, or resistance-activated releases without a wrist strap are available.

While some argue that non-wrist strap releases are more accurate, they can be challenging to master and may increase the risk of developing lateral epicondylitis.

Using a release with a wrist strap has the potential to alleviate stress and pain at the lateral elbow, facilitating the ability to continue shooting.

3. Kinesiotape:

Application of kinesiotape along the forearm extensor musculature can benefit certain individuals.

Applied parallel to the muscle fibers and running the forearm’s length, kinesiotape supports the musculature, improving comfort during aggravating activities.

Similar to counterforce braces, kinesiotape is a valuable tool for managing lateral epicondylitis and can be a helpful addition to your toolkit.

I am fully supportive of exploring solutions to alleviate pain, and if an affordable product can effectively reduce pain and enable continued activity, it is certainly worth giving it a try.

Smart Modifications to Your Routine

Finally, we’ll explore adjustments and practices that can significantly contribute to managing and alleviating lateral epicondylitis, commonly known as tennis elbow, for archers and bowhunters.

These modifications range from reducing shooting volume and incorporating alternative strength training to adjusting draw weight.

1. Decrease Shooting Volume

Lateral epicondylitis often results from repetitive activities that strain the hand and wrist muscles. Archers and bowhunters, shooting high volumes of arrows in one session, are at increased risk.

If one experiences lateral elbow pain during or after shooting, consider reducing the number of arrows per session or taking a break for a few days. Use this time for other hunting preparations, such as setting up tree stands, trimming trees, or scouting.

Short-term rest promotes healing, reducing the risk of chronic elbow pain.

2. Focus on Alternative Strength Training

If lateral elbow pain hinders bow shooting, alternative strength training can address deficits elsewhere. Research suggests that weakness in the rotator cuff muscles is often present with lateral epicondylitis.

Refine upper extremity muscles, especially the shoulder girdle, to expedite recovery and lower long-term injury risks.

Improved general strength and conditioning enhance accuracy, leading to more successful hunts. Alternative exercises targeting the core, legs, and hand-eye coordination maintain peak condition without heavy gripping.

3. Decrease Draw Weight

Lowering draw weight is a strategy to alleviate lateral elbow pain and resume shooting. Reduced draw weight lessens stress on hand and wrist muscles, easing discomfort and fostering healing.

As elbow pain diminishes, gradually increase draw weight over a week or two to prevent exacerbation. Patience and consistency are crucial in managing lateral epicondylitis.

By incorporating these modifications, treatments, and products into a normal daily routine, one may relish the outdoors without elbow pain secondary to lateral epicondylitis. 

Summary

In this blog post, the prevalent concern of elbow pain, specifically lateral epicondylitis, affecting bowhunters has been addressed. By examining symptoms, causes, and providing practical tips, archers and bowhunters are prepared to navigate the woods with enhanced accuracy in the upcoming hunting season. These guidelines create a path for enjoying the great outdoors without the hindrance of elbow discomfort, enabling the pursuit of passion with renewed confidence and enduring comfort.

As an Amazon Affilliate, I earn from qualifying purchases.

About the Author

About the Author

Taylor Kuhlmann, PT, DPT, CSCS

Taylor Kuhlmann is a licensed physical therapist in Kansas, a certified strength and conditioning specialist accredited by the National Strength and Conditioning Association, and the founder of High Caliber Health.

With a passion for guiding hunters and outdoor enthusiasts, Taylor focuses on enhancing their overall health and wellness, enabling them to experience the outdoors with reduced pain and enhanced performance.

How Do I Increase Draw Weight for Archery?

How Do I Increase Draw Weight for Archery?

How Do I Increase Draw Weight for Archery?

Introduction

Increasing draw weight requires a holistic strategy that encompasses strength training, consistent shooting practice, proper nutrition, and flexibility upkeep.

Increasing draw weight offers various benefits, whether you’re gearing up for larger game hunting or aiming to enhance your shot lethality. Rather than abruptly increasing your draw weight by 20-30 pounds, I recommend adopting a systematic plan to attain goals while minimizing injury risks.

Embracing a strategic approach not only aids in achieving bow hunting aspirations but also mitigates the possibility of sidelining injuries due to improper handling.

Avoid the trap of overexerting and injuring yourself while attempting to overpower your bow. Such injuries could hinder your upcoming hunting season.

How Do I Train for Higher Draw Weight?

Training to increase your draw weight requires a well-rounded approach that combines strength training, consistent shooting practice, proper nutrition, and flexibility maintenance.

Let’s dive into each aspect to understand how to effectively train for higher draw weight, all while prioritizing injury prevention and overall health.

Strength Training: 3-4 Times a Week:

A solid strength training routine is the foundation for building the muscles necessary for drawing a higher weight bow. Focus on exercises that target the key muscle groups used in archery, such as the back, shoulders, biceps, and core. Incorporate compound movements like bent over rows, lat pulldowns, and shoulder presses to engage multiple muscle groups simultaneously.

Choose 4-5 of the exercises from this blog post to work into your weekly routine. Mix and match throughout the week to ensure you are targeting all areas of your body.

Dumbbells are the most versatile piece of exercise equipment you can own for your at home workouts. The dumbbells below can certainly assist you in increasing your draw weight!

Shooting Practice: 2-3 Times a Week

The adage “practice makes perfect” resonates profoundly here. Consistent shooting practice is indispensable for perfecting archery skills and gradually increasing draw weight. 

Allocate dedicated time each week to shoot your bow, with the focus on maintaining proper form, technique, and precision.

Start with a manageable draw weight and gradually increase it as your muscles acclimate to heightened tension. Regular practice not only empowers you to handle increased draw weights but also bolsters confidence and shooting accuracy in real hunting scenarios. 

Each practice shot should prepare you for the one shot that matters this fall. 

Optimize Protein Intake:

Protein plays a crucial role in muscle repair and growth, making it a vital component of your nutrition plan when training for higher draw weight. Aim to consume 1 gram of protein per pound of body weight daily from sources like lean meats, poultry, fish, eggs, and dairy.

Consider incorporating protein supplements into your diet if needed, especially after intense workouts, to support muscle recovery and development.

Based on my experience, a significant number of people fail to meet their daily protein intake recommendations. This deficiency can hinder progress and impede improvements in muscle strength, and ultimately, increasing draw weight. 

Maintain Flexibility:

In archery, flexibility is key to achieving optimal shooting form and preventing injuries. Incorporate regular stretching and mobility exercises into your routine to maintain flexibility in the spine, hips, and shoulders. 

Warm up before strength training and shooting practice with dynamic stretches to prepare your muscles for action. After workouts, include static stretches to improve flexibility and reduce muscle tightness.

A supple and flexible body will not only aid in handling higher draw weights but also contribute to better shooting mechanics and overall performance.

By adhering to a holistic training regimen and ensuring adequate protein intake, you’re poised to increase your draw weight and ascend to new pinnacles in your bowhunting adventures.

Keep in mind that patience, consistency, and proper technique are crucial components of a successful journey towards increasing draw weight.

Advantages for Increasing Draw Weight with Archery:

Increasing draw weight holds a range of advantages, particularly for passionate hunters seeking to amplify their performance in the field.

Let’s explore the advantages that come from using a higher draw weight while shooting in the field.

Increased Arrow Speed:

With a higher draw weight, the bow imparts more energy to the arrow, resulting in increased arrow speed. Faster arrows cover the distance to the target more quickly, reducing the time it takes for your shot to reach its mark. This increased arrow speed proves especially valuable when engaging moving targets or those prone to being easily startled.

Improved Penetration:

Higher draw weights generate greater kinetic energy upon release, leading to improved arrow penetration. When hunting larger game or faced with challenging shot angles, this increased penetration can make the difference between a clean, ethical kill and a wounded animal.

Greater Effective Range:

The added power of a higher draw weight extends your effective shooting range. This means you can confidently take shots at longer distances, giving you more opportunities to secure a successful harvest.

Enhanced Accuracy:

When properly trained and conditioned for higher draw weights, you’ll notice improved shooting stability and reduced bow movement. This enhanced control translates into greater shot accuracy, allowing you to place arrows with precision.

Adapting to Hunting Conditions:

Hunting situations can vary, and sometimes you may need to draw your bow under less-than-ideal circumstances, such as when wearing heavy clothing during cold weather. Being accustomed to a higher draw weight prepares you to handle these situations with ease and consistency.

Physical Strength and Endurance:

Drawing a higher weight bow requires greater physical strength. Regularly practicing with higher draw weights can help build and maintain the necessary muscles for archery, contributing to improved overall strength and endurance.

Why You May NOT Want to Increase Draw Weight

While increasing draw weight offers numerous benefits, it’s important to consider potential drawbacks that might lead you to reconsider this endeavor. Let’s examine several reasons why you might hesitate to raise your draw weight:

Muscle Fatigue

Elevating your draw weight can subject your muscles to heightened strain and fatigue, particularly during extended practice sessions. Over time, this could impede your ability to maintain consistent and accurate shots, impacting both your training progress and in-field performance.

Breakdown in Technique

A heavier draw weight can inadvertently lead to a breakdown in your shooting technique. As your muscles contend with increased tension, you might find it challenging to uphold the smooth and precise form essential for accurate shooting. This regression in technique could hinder your progress and undermine your shooting confidence.

Increased Risk of Injury

Training with a higher draw weight without proper preparation or progression can elevate the risk of injuries. Straining muscles or overexerting yourself could result in strains, muscle imbalances, or even more serious injuries, setting back your training schedule and overall archery goals.

Decreased Accuracy

Ramping up draw weight can potentially lead to a temporary decrease in accuracy. As your body adapts to the heightened tension, your shots might become less consistent and less precise. This dip in accuracy can be frustrating and might require extra time to recalibrate your shooting skills.

Requires More Body Movement

Drawing a bow with a higher weight might necessitate additional body movement to compensate for the increased tension. This can affect your shooting stability and introduce variability in your shots, making it harder to maintain the steady aim required for accurate targeting.

Balancing the advantages of higher draw weight with these potential drawbacks is essential for making an informed decision.

Careful consideration of your physical capabilities, training regimen, and long-term archery goals will help you determine whether increasing draw weight is the right step for you.

In Conclusion: Striking the Balance

Embarking on the journey to increase draw weight involves a delicate balance between the undeniable benefits and the potential challenges it presents.

As we’ve explored the advantages of enhancing draw weight, from augmented arrow speed to expanded effective range, it’s evident that this pursuit can elevate your archery skills and bolster your performance in the field.

However, it’s equally crucial to acknowledge the factors that might give you pause when considering this leap. Muscle fatigue, potential breakdowns in technique, an increased risk of injury, temporary accuracy fluctuations, and the demand for heightened body movement all underscore the importance of measured approach.

As you tread this path, keep in mind that patient progression and meticulous attention to technique are paramount. The decision to increase draw weight should be rooted in a deep understanding of your body’s capabilities and your archery aspirations. Diligently nurturing your muscles through strength training, fine-tuning your shooting skills through consistent practice, and supporting your body with proper nutrition and flexibility maintenance will serve as your guiding principles.

In the diverse world of archery, choosing to raise draw weight directly impacts your accuracy, power, and skill. By embracing benefits, recognizing challenges, and navigating with care, you create a balanced blend of expertise and strength. This journey paves the way for progress in archery, leading to personal growth and success.

Disclosure: as an amazon affiliate, I earn commissions from qualifying purchases made through the links provided on this website and blog posts, which help support its maintenance and content creation.

About the Author

About the Author

Taylor Kuhlmann, PT, DPT, CSCS

Taylor Kuhlmann is a licensed physical therapist in Kansas, a certified strength and conditioning specialist accredited by the National Strength and Conditioning Association, and the founder of High Caliber Health. With a passion for guiding hunters and outdoor enthusiasts, Taylor focuses on enhancing their overall health and wellness, enabling them to experience the outdoors with reduced pain and enhanced performance.

The Importance of Exercise for Hunters: Improving Stamina, Reducing Pain, and Enhancing Balance

The Importance of Exercise for Hunters: Improving Stamina, Reducing Pain, and Enhancing Balance

The Importance of Exercise for Hunters: Improving Stamina, Reducing Pain, and Enhancing Balance

Introduction

If you’re serious about dominating the great outdoors, it’s time to give exercise the attention it deserves. Exercise isn’t just about staying fit—it’s about boosting your stamina, reducing pain, and unleashing your inner hunting beast! As a physical therapist, strength and conditioning specialist, and an avid hunter, I’m here to show you why exercise is the key to becoming a true hunting legend. My goal is to assist you in improving health and wellness so you can enjoy the outdoors for life. So, let’s gear up and embark on this exciting adventure together!

Defying the Hands of Time

As we get older, our bodies may not be as agile as they used to be. But don’t worry – there is something you can do about it! Exercise works like magic for hunters. By lifting weights and doing resistance training, you can keep your hard-earned muscles and stay strong. No more struggling with heavy gear or tough terrain. Stay fit and stay sharp!

Read this entire paragraph in the photo below!

Muscle mass decreases with age.

It’s important to recognize the fact that we lose muscle as we age, as early as 30 years old! Also, take a look at the sentence regarding the progressive increase in fat mass. It’s alarming. We’re losing strength and gaining fat mass – no wonder why we hurt as we get older! 

If you don’t maintain your activity level, there is no doubt you will lose the ability to stay hunting and spending time outdoors. Start now!

Stress? Not in Our Hunting Grounds

Life can certainly be stressful and overwhelming. But guess what? Exercise is our secret weapon against stress and anxiety. When you work up a sweat, your body releases feel-good chemicals called endorphins that make you feel like a boss and lowers stress levels. So, turn on some tunes, get outdoors, and say goodbye to the stress. A decrease in stress will help you clear your mind and think better. This will certainly help improve your success with hunting, as well as all other aspects of life!

Master the Hunt with Grace and Agility

Imagine this: you’re quietly tracking your prey, navigating tricky terrain, and suddenly, oops! You stumble and crash like a clumsy bull. Not a good look, right? Well, exercise is here to save the day. By doing exercises that improve your balance and coordination, like traditional strength training or Yoga, you’ll move with the agility of a wildcat. No more embarrassing tumbles. You’ll glide through the woods like a true hunting pro.

Inspire a New Generation of Hunters

As a father, I strive to spend valuable time with my children outdoors. When you embrace exercise and live a healthy lifestyle, you become a role model for the next generation. Just picture your little ones, wide-eyed and eager to follow in your footsteps on the next hunting adventure. Show them the way, so they can enjoy the outdoors for life. Take them along on your next turkey hunt, teach them to bait a hook, and let them see the strength and vitality that comes from embracing the wild side. They’ll grow up strong and resilient, just like their hunting hero.

Kid sitting in duck blind
Kid on a successful Spring turkey hunt

Conclusion

So, it’s time to unlock your true potential. Exercise is your ticket to becoming the ultimate hunting legend. Embrace the weights, conquer stress, perfect your balance, and inspire the next generation to embrace their wild side. And remember, have some fun along the way because life’s an adventure meant to be enjoyed. Now go out there and make your mark on the hunting world. Happy hunting!

Improving Posture and Alignment for Hunters

Improving Posture and Alignment for Hunters

Improving Posture and Alignment for Hunters

Introduction

For hunters and outdoor enthusiasts, good posture and spinal alignment are essential for performing at a high level and reducing the risk of injury. In this blog post, I’ll highlight the benefits of proper posture and alignment for hunting and outdoors activities, common posture and alignment issues that hunters and outdoor enthusiasts may face, and techniques for improve posture and spinal alignment.

The Fundamentals: Understanding Good and Bad Posture

Poor posture is often defined as having a forward head and rounded shoulders. Some people also refer to poor posture as a “hunchback” position, in which the thoracic spine is rounded as well. However, poor posture is not always the main cause of neck, shoulder, or back pain. As a physical therapist, I have encountered individuals who have poor posture but do not experience the typical pain associated with it.

In contrast, good posture is described as standing upright with engaged shoulder blades, and with the head, neck, shoulders, and hips aligned in a straight line.

Regardless of your posture, it is important to move in and out of certain positions throughout the day to prevent aches, pains, and movement dysfunctions. Maintaining the same posture for an extended period can lead to discomfort and increase the risk of injury.

For hunters, assuming different postures and positions is necessary for success. I’m not sure I’ve ever been on a hunt where I haven’t thought, “damn, I hope I don’t’ have to hold this position too long.” It is crucial for hunters to maintain flexibility and strength, move often, and recognize postural abnormalities while hunting to prevent injury and maximize success.

The Performance Benefits of Proper Posture and Alignment

Good posture and alignment can have a significant impact on performance and injury risk during hunting and outdoor activities. When your body is in proper alignment, you can move more efficiently and with less effort, which can help conserve energy and increase endurance. Additionally, good posture and alignment can improve your balance and stability, making it easier to move over uneven terrain and maintain your footing.

Here’s an activity that will show you how a rounded back and forward shoulders can negatively impact your performance with overhead activities. While sitting or standing, slouch over and round your shoulders forward. Then reach as high as you can with both arms and appreciate how high you can reach. Next, sit or stand up nice and tall with “good posture.” Then repeat the overhead reaching with both arms. Notice how much more shoulder and spinal range of motion is achieved.

Proper posture and alignment can also reduce the risk of injury. When your body is in proper alignment, there is less strain on your joints, muscles, and other tissues. This can reduce the risk of overuse injuries, such as tendinitis and bursitis, as well as acute injuries, such as sprains and strains.

Shoulder impingement, rotator cuff tendinitis, and neck pain are a few conditions that hunters experience from poor shooting form and posture with archery.

Common Posture and Alignment Issues for Hunters and Outdoors Enthusiasts

Hunters and outdoors enthusiasts may face a variety of posture and alignment issues that can affect their performance and injury risk. For example, carrying heavy packs or equipment can cause the shoulders to round forward, which can increase the risk of shoulder and low back injuries and reduce lung capacity. Sitting on a bucket in a ground blind can cause a posterior pelvic tilt, leading to low back pain or sciatica symptoms.

To find your neutral pelvis position, perform an anterior and posterior pelvic tilt as far as you can in both directions. Your neutral position is midway between the extreme ranges of motion. Once you find your neutral pelvic position, perform core and hip strengthening exercises while maintaining this position. Improving awareness of your pelvis positioning will allow you to make postural adjustments and alleviate pain while hunting.

Other common posture and alignment issues for hunters and outdoors enthusiasts include a forward head posture, which can cause neck and shoulder pain, or a weak core, which can affect balance and stability. These issues can be compounded by spending long periods of time sitting or standing in one position, which can cause muscles to become tight or fatigued.

Techniques to Improve Posture and Spinal Alignment

There are several techniques that hunters and outdoors enthusiasts can use to improve their posture and alignment. First, it’s important to be aware of your posture and alignment throughout the day. Take breaks and change positions frequently. When carrying heavy loads, use a backpack or other equipment designed to distribute weight evenly across your body.

Exercises can also be helpful for improving posture and alignment. Core strengthening exercises, such as planks and bird dogs, can improve stability and reduce the risk of lower back pain. Stretching exercises, such as hip flexor stretches and chest stretches, can help improve posture by reducing muscle tension. Prone press-ups and thoracic extension and rotation exercises are also gold when it comes to postural corrective exercises.

I recommend exercise snacks every 45-60 minutes. Exercise snacks can include a short walk, desk exercises with emphasis on thoracic extension, or laying on your stomach for a few minutes. A few minutes of exercise or movement spread throughout the day can yield substantial benefits for posture and pain relief.

Additional Considerations: Footwear, Carrying Loads, and Hydration

In addition to posture and alignment, there are several other factors that can affect performance and injury risk during hunting and outdoors activities. For example, footwear is an important consideration, as wearing the wrong shoes or boots can cause foot and ankle injuries. It’s important to choose footwear that is appropriate for the terrain and provides adequate support and cushioning.

Hunting boots that I can recommend as a physical therapist are the Danner and Crispi brands. I’ve put many of miles on these brands of boots while hunting elk through the Rocky Mountains and pheasants through snow in the Kansas terrain.

Carrying heavy loads can also be a significant challenge, both for posture and alignment and for overall performance. It’s important to distribute weight evenly and use equipment that is designed to reduce the strain on your body. Find a hunting pack that fits your body and is comfortable. There are many, many brands and options, but some are extremely pricey. The Tidewe brand has a few cheaper versions which worked great for my last elk hunt.

Additionally, staying hydrated and properly fueling your body with nutrition can help improve performance and reduce the risk of injury.

Conclusion: Prioritize Posture and Alignment for Success in Hunting and Everyday Life

Proper posture and alignment are essential for performing well and reducing the risk of injury during hunting and outdoors activities. By being aware of your posture and alignment, doing exercises to improve your core and stretching regularly, and taking breaks to change positions and move around, you can improve your posture and alignment and reduce your risk of injury.

“Bad posture” may or may not contribute to aches and pains. The key point from this post is to improve awareness of your posture and to move frequently throughout your daily routine.

Remember, good posture and alignment are not just important during hunting and outdoors activities, but also in your daily life. By incorporating these techniques into your routine, you can improve your overall health and wellbeing and perform at your best both in the great outdoors and in everyday activities. So, take the time to prioritize proper posture and alignment, and enjoy all the benefits that come with it.

Happy hunting!